Introduction
Gradle is a modern build automation tool that helps developers manage the entire build lifecycle of their projects. It’s widely used in Java development and is recognized for its flexibility and performance. In this Gradle build automation tutorial, we will cover everything you need to know about Gradle, including installation, comparisons with other tools, and advanced features. Whether you’re a beginner or an experienced developer, this guide will enhance your understanding of Gradle and its functionalities.
Gradle Tutorial for Beginners
Gradle is built on a domain-specific language (DSL) based on Groovy, making it highly expressive and easy to read. This Gradle build automation tutorial will walk you through the basics, from setting up a simple build file to understanding tasks and dependencies.
Getting Started with Gradle Build Automation
To start using Gradle, you need to create a build script named build.gradle. This script defines your project configuration, including tasks, plugins, and dependencies.
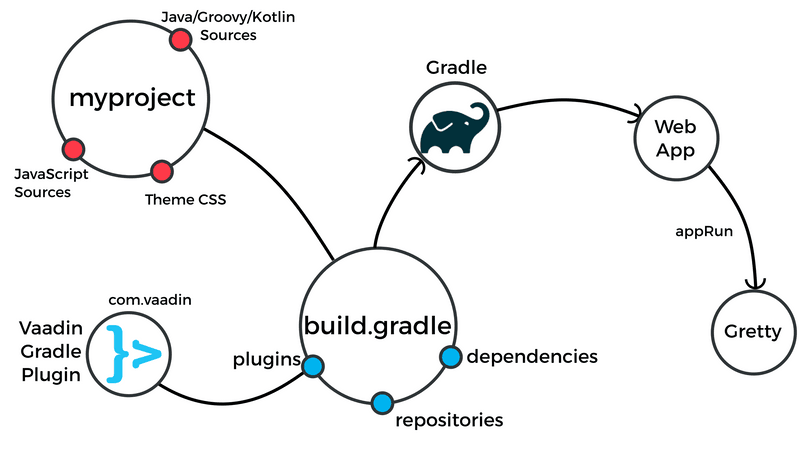
Example of a Simple Build Script
apply plugin: 'java'

repositories {
    mavenCentral()
}

dependencies {
    implementation 'org.springframework:spring-core:5.3.8'
}
Step-by-Step Process
Installing Gradle is straightforward. You can download it from the Gradle website, or if you’re using a package manager like SDKMAN! or Homebrew, you can install it directly through those tools.
Gradle Installation Steps Explained
- Download: Visit the Gradle releases page and download the latest version.
- Unzip: Extract the downloaded zip file to your desired location.
- Set Environment Variables: Add the Gradle
bindirectory to your system’s PATH variable. - Verify Installation: Open a terminal and run
gradle -vto check if Gradle is installed correctly. - Gradle installation in Eclipse
Step1
- Go to Help >Eclipse Marketplace…
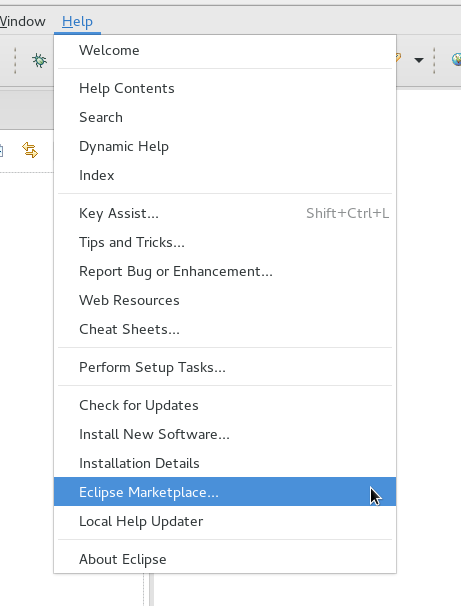
Step2
- Search for “buildship”
- Click the Install button
- Continue through the wizard, accepting the license
- Restart Eclipse when prompted
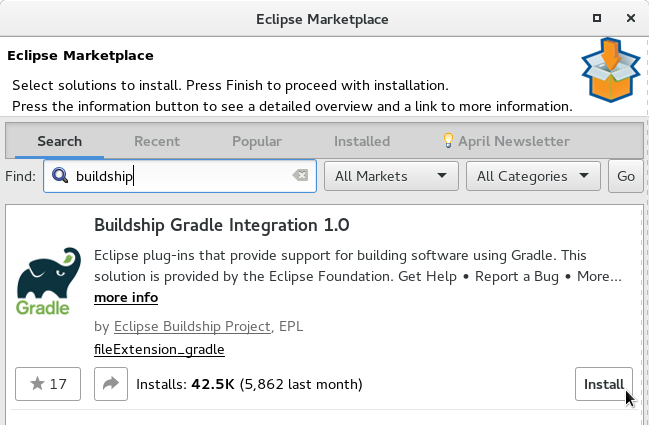
Step3
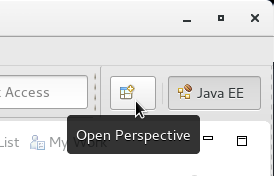
- Click the Open perspective button
- Select the Git perspective
Step4
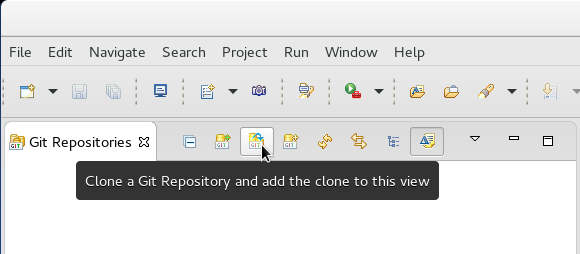
- On the Git Repositories view, click the button to Clone a Git Repository
- Choose a directory to store the checked out code and click Finish.
- Note: this should not be in your eclipse workspace
- Note: do not select the option to import existing Eclipse projects as it does not work for Gradle projects
Gradle vs Maven
Both Gradle and Maven are popular build tools in the Java ecosystem, but they have key differences.
- Flexibility: Gradle is more flexible due to its use of Groovy DSL, allowing for custom build logic.
- Performance: Gradle’s incremental builds are generally faster compared to Maven’s lifecycle model.
- Dependency Management: Both tools handle dependencies effectively, but Gradle’s approach is more dynamic.
Gradle vs Ant
While Ant is a well-known build tool, Gradle offers several advantages:
- Declarative vs Imperative: Gradle uses a declarative approach (describing what to do), while Ant uses an imperative approach (describing how to do it).
- Dependency Management: Gradle has built-in dependency management, making it easier to manage libraries.
Gradle vs Jenkins
Jenkins is a continuous integration tool, while Gradle is a build automation tool. However, they can work together seamlessly:
- Integration: Jenkins can run Gradle builds as part of its pipeline, enabling automated testing and deployment.
- Flexibility: Gradle’s configuration allows you to customize your build process, which can be integrated into Jenkins jobs.
Gradle Dependencies
Managing dependencies is one of Gradle’s core features. You can easily add, remove, and update dependencies in your build.gradle file. Gradle supports various repositories like Maven Central and JCenter.
Example of Adding a Dependency
dependencies {
    implementation 'com.google.guava:guava:30.1-jre'
}
Gradle Repository
Gradle can pull dependencies from various repositories. You can specify repositories in your build script using:
repositories {
    mavenCentral()
    jcenter()
}
Projects & Tasks
In Gradle, a project can contain multiple tasks that represent a single piece of work. Tasks can be defined in your build script and can depend on each other.
Example of Defining a Task
code
task hello {
    doLast {
        println 'Hello, Gradle!'
    }
}
Gradle Build Scans
Build scans provide insights into your build performance and help identify issues. To enable build scans, add the following to your build script:
plugins {
    id 'com.gradle.build-scan' version '3.6'
}

buildScan {
    publishOnFailure()
}
Gradle Wrapper
The Gradle Wrapper allows you to run Gradle builds without requiring the user to install Gradle manually. It ensures that your project always builds with the same Gradle version.
Setting Up the Gradle Wrapper
You can generate the wrapper by running the following command:
gradle wrapper
This creates the necessary files to use the wrapper in your project.
Gradle Multiproject Builds
Gradle supports multiproject builds, allowing you to manage multiple projects within a single build. This is useful for large applications with various modules.
Example of a Settings File
rootProject.name = 'MyMultiProject'
include 'moduleA', 'moduleB'
Gradle Java Application
Gradle simplifies the process of building Java applications. By applying the Java plugin, you can easily compile, test, and package your application.
Basic Configuration for a Java Application
code
apply plugin: 'java'

jar {
    manifest {
        attributes 'Main-Class': 'com.example.Main'
    }
}
Conclusion
Gradle is a powerful tool that streamlines the build process for Java applications. By understanding its features and capabilities, you can leverage Gradle to improve your workflow and enhance project management. Whether you’re new to Gradle or looking to deepen your knowledge, this guide provides a solid foundation for mastering build automation.
you can refer https://maticsacademy.com/generics-in-java/
Gradle official site : https://gradle.org/
Interview Questions :
1.Google – What are the key advantages of using Gradle over Maven and Ant?
Gradle is more flexible than Maven due to its Groovy-based DSL, allowing custom build logic and easier configuration. It also has better performance, thanks to incremental builds and caching. Compared to Ant, Gradle’s declarative approach is more intuitive, and it offers built-in dependency management, making complex builds simpler to manage.
2.Microsoft – How does Gradle manage dependencies, and what are the common repositories used?
Gradle manages dependencies by defining them in the dependencies block of the build.gradle file. Common repositories include Maven Central and JCenter, which are specified in the repositories block. Gradle fetches the dependencies during build time, handling version conflicts and caching for performance.
3.Infosys – What is the difference between a Gradle task and a project?
Answer: In Gradle, a project represents an entire buildable unit, such as an application or a library. Each project can have multiple tasks, which are individual pieces of work like compiling code or running tests. Tasks are reusable, can be configured to depend on each other, and define the specific steps within a project’s lifecycle.
4.Accenture – How does Gradle support multiproject builds, and what is the benefit?
Gradle supports multiproject builds by allowing multiple projects to be managed within a single build. The settings.gradle file defines which projects are included. Multiproject builds allow you to build, test, and deploy related projects together, making it ideal for large applications with multiple modules. It improves build efficiency by sharing configurations and dependencies.
5.Wipro – How does Gradle handle caching, and why is it beneficial?
Gradle’s caching mechanism avoids re-running tasks that haven’t changed, by storing results from previous builds. This includes task output caching and dependency caching. Caching improves build times significantly, especially in projects with complex dependencies or repetitive builds, as only changed files trigger rebuilds.
Test Your Knowledge: Python Dictionary
Question
Your answer:
Correct answer:
Your Answers
