Introduction:
Java, a widely-used programming language, is popular for its flexibility, efficiency, and compatibility across platforms. If you’re eager to start developing applications, the first step is setting up the right environment. This guide walks you through each step to install, configure, and verify your Java setup, so you’re ready to begin coding!
Before this you need to understand the working of java. For a detailed explanation of how Java works, check out this link: How Java Works.
Step 1: Download the Java Development Kit (JDK):
The Java Development Kit (JDK) provides all essential tools for building applications, including the Java Runtime Environment (JRE) and the compiler.
1. Access the JDK Download Page:
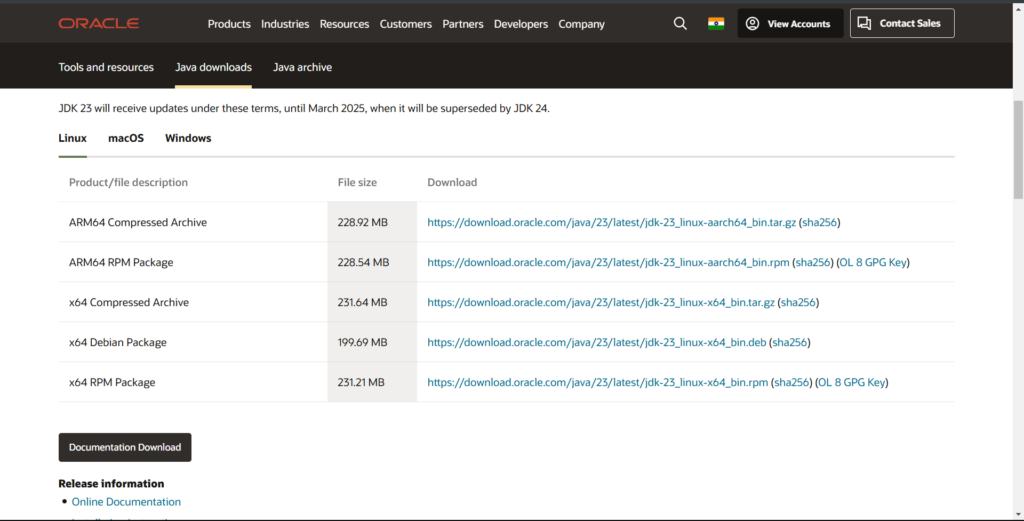
Visit Oracle’s official JDK download page.
Choose the latest version that suits your operating system (Windows, macOS, or Linux).
2. Choose the Correct Installer:
Windows: Download the .exe file.
macOS: Select the .dmg file.
Linux: Use the .tar.gz file or install directly from your package manager.
3. Download the JDK:
Click the installer link, agree to the license terms, and save the file on your device.
(For Windows only)
Step 2: Install the JDK
Once you have the installer, follow these steps to get everything set up:
1. Launch the Installer:
Double-click the downloaded file to begin the installation.
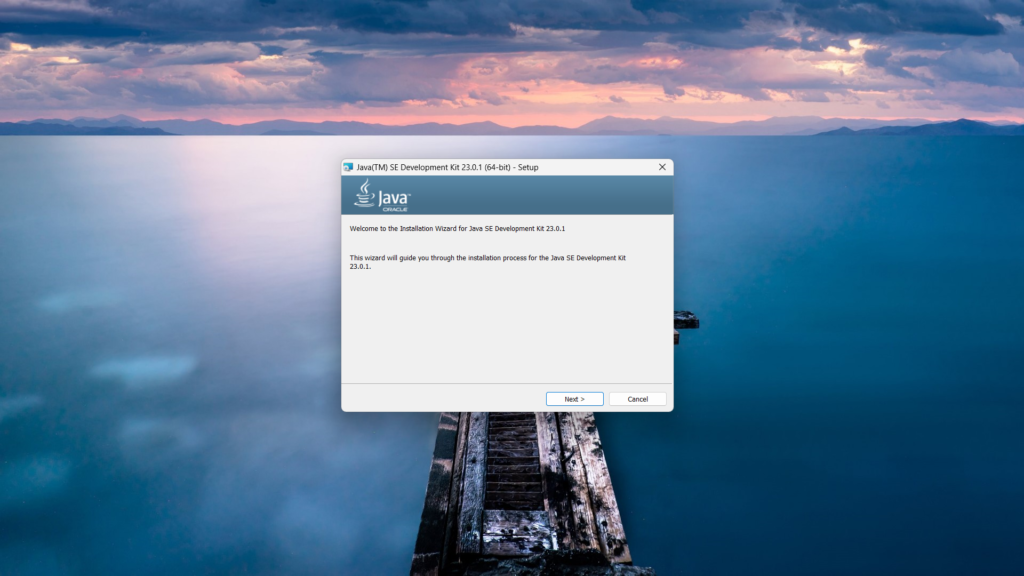
Follow the on-screen prompts in the setup wizard to proceed.
2. Choose the Installation Directory:
For simplicity, keep the default path, such as C:\Program Files\Java\jdk-xx on Windows.
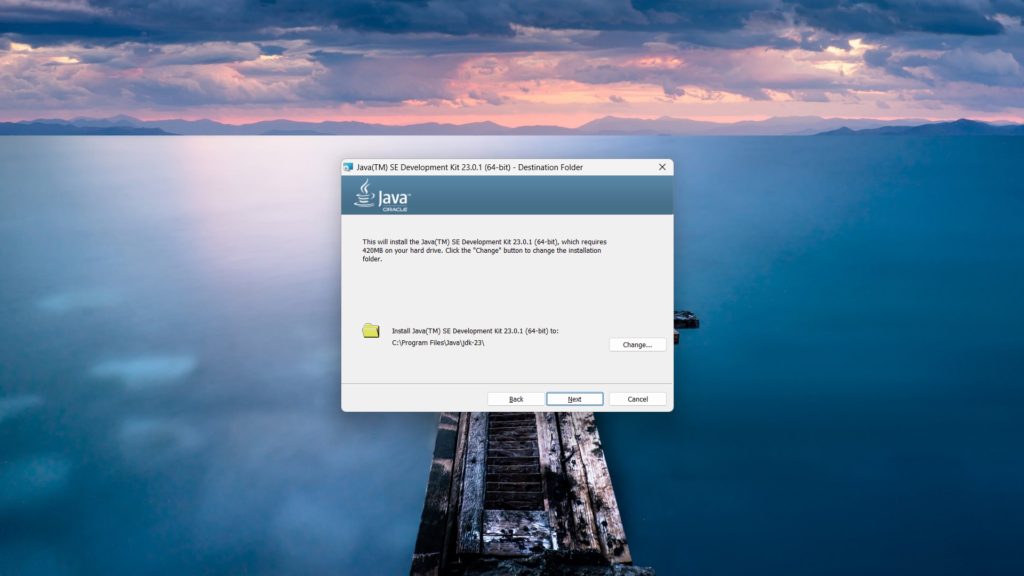
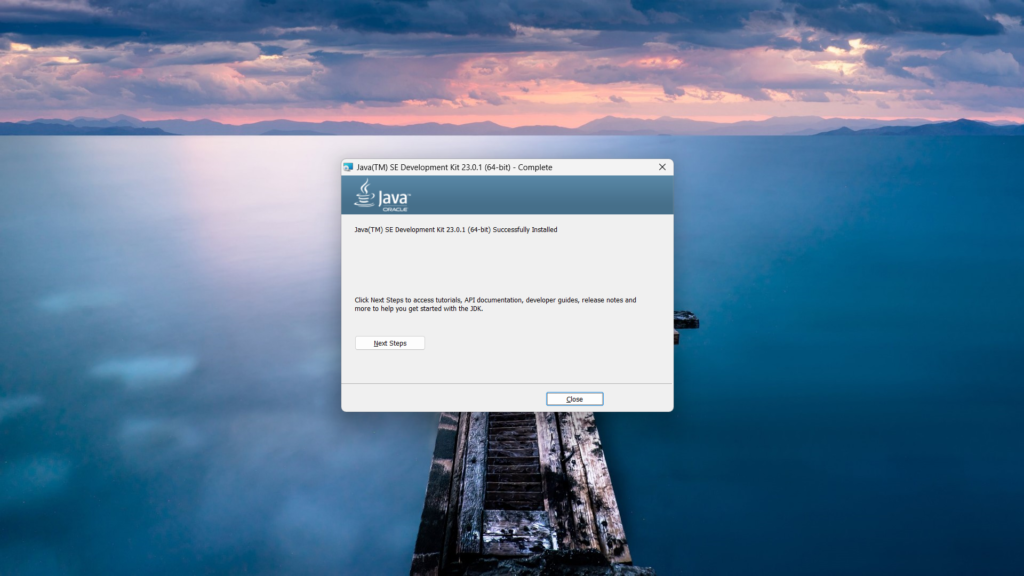
3. Complete the Installation:
The installation process will automatically install both the JDK and JRE. Once finished, click “Finish” to complete.
Step 3: Set Up Environment Variables
To allow your system to run Java applications from the command line, you need to set up a JAVA_HOME variable and update your system path.
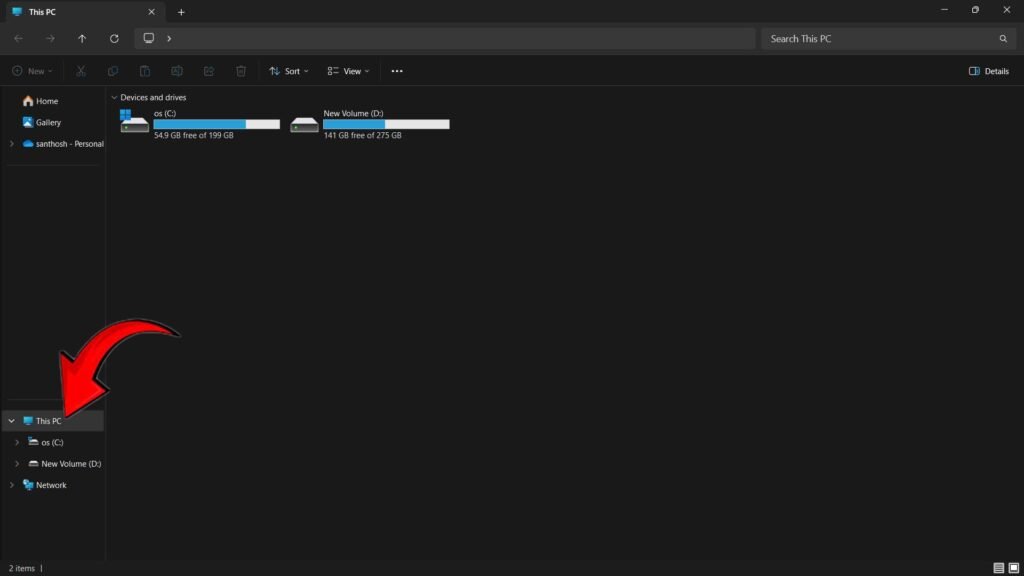
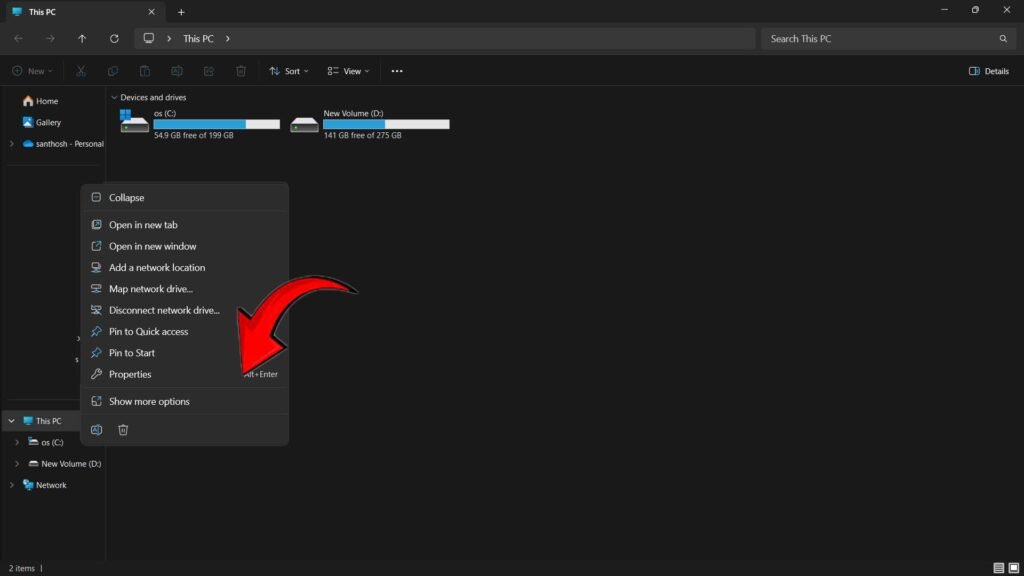
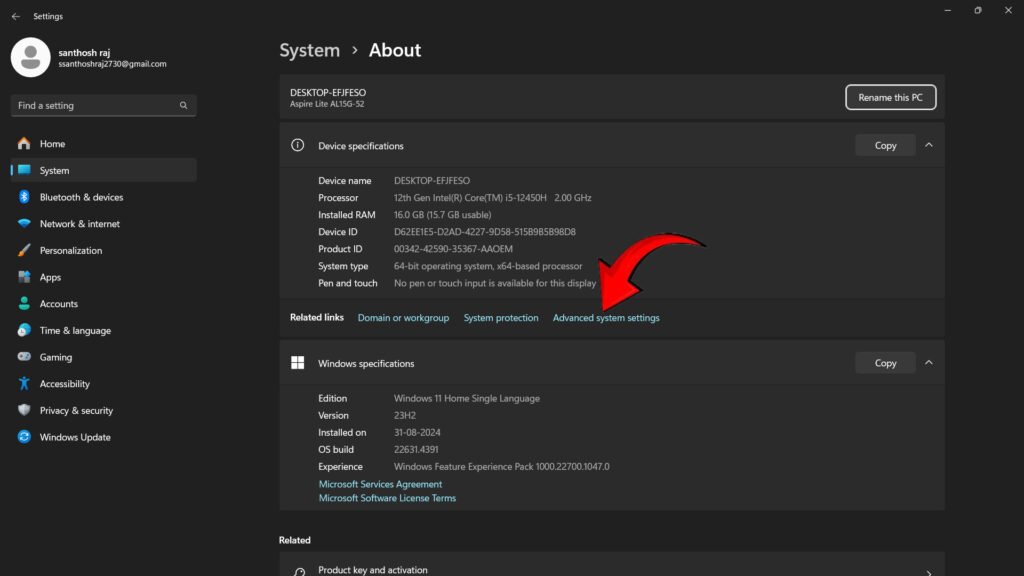
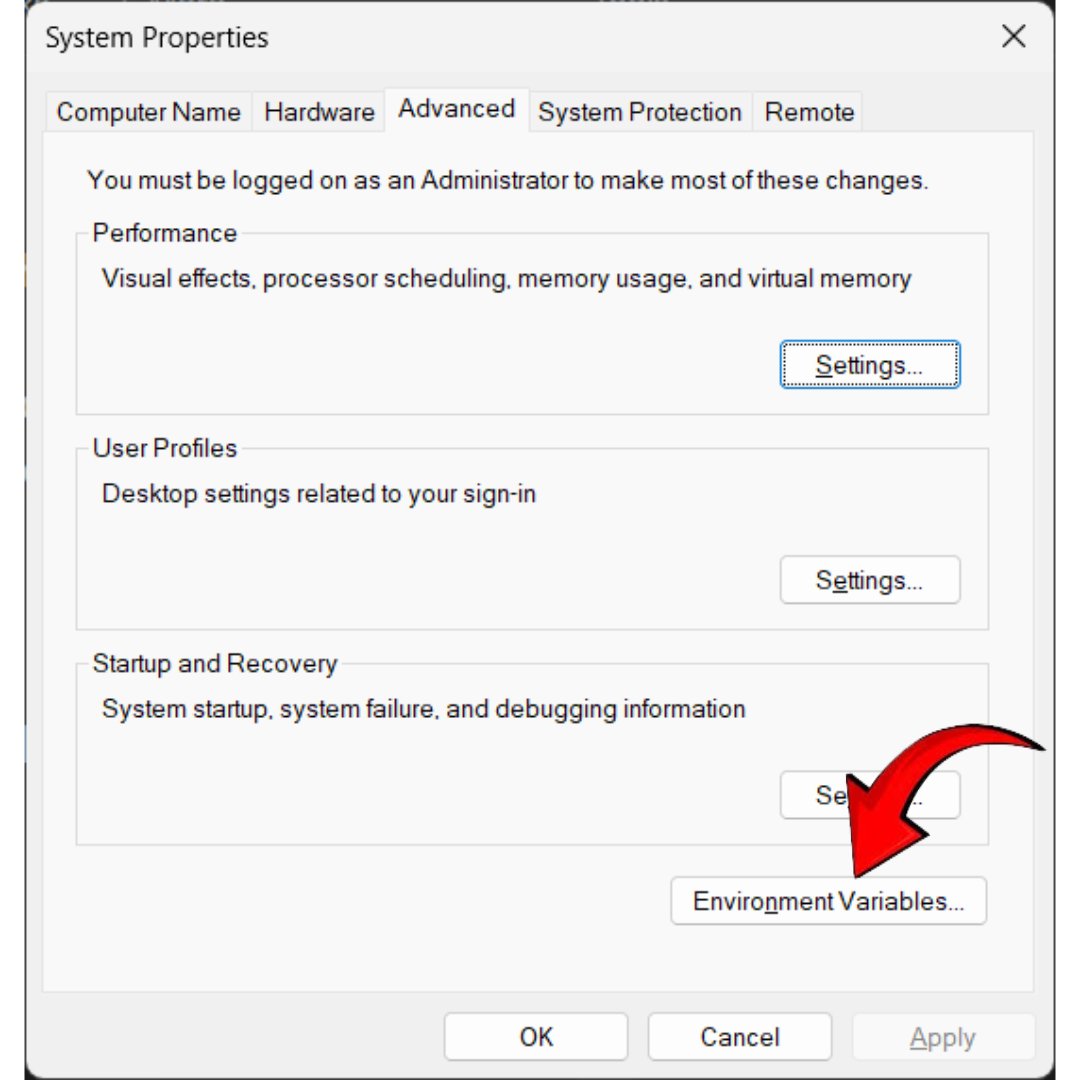
1. Open the Environment Variables Panel:
Right-click on “This PC” or “My Computer” and select “Properties.”
Go to “Advanced System Settings” > “Environment Variables.”
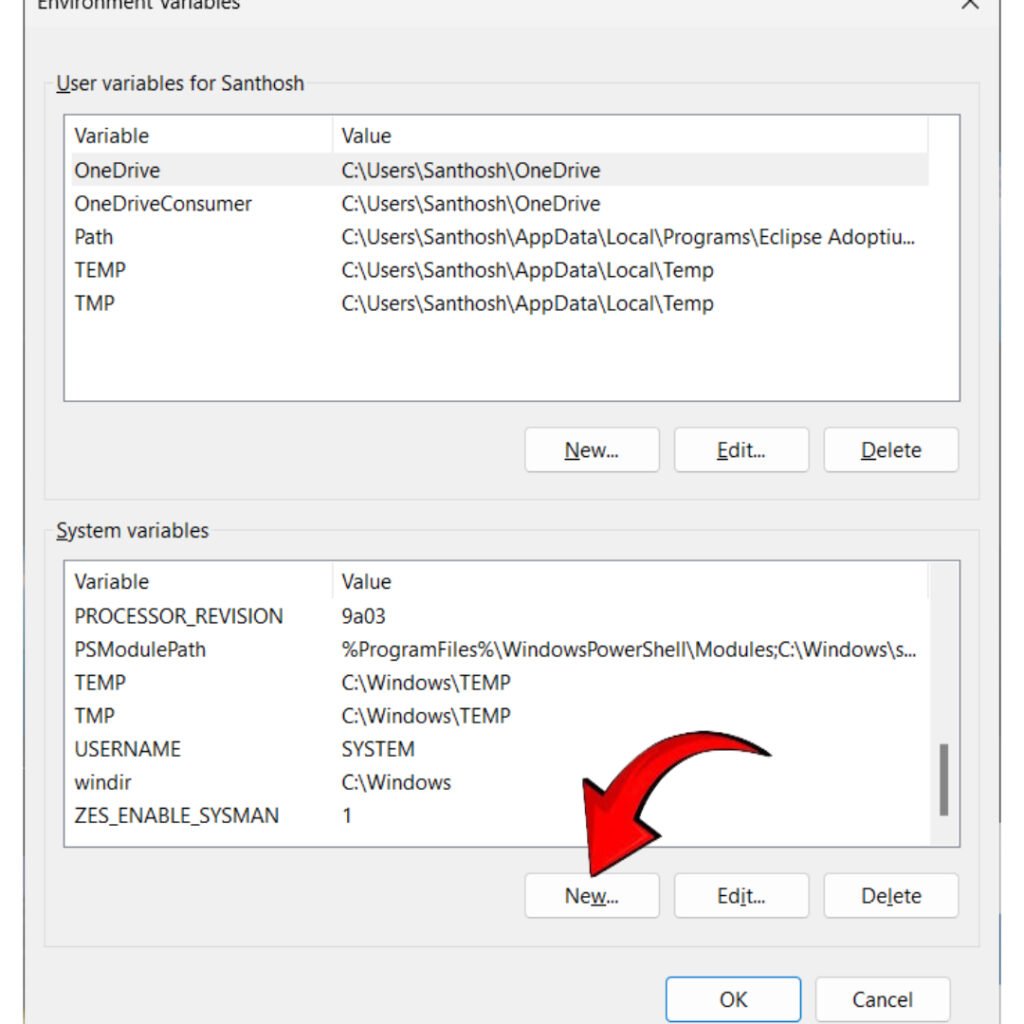
2. Create the JAVA_HOME Variable:
Under “System Variables,” click “New.”
Set the Variable Name to JAVA_HOME and Variable Value to the JDK path, like C:\Program Files\Java\jdk-xx.

3. Add JDK bin to the Path:
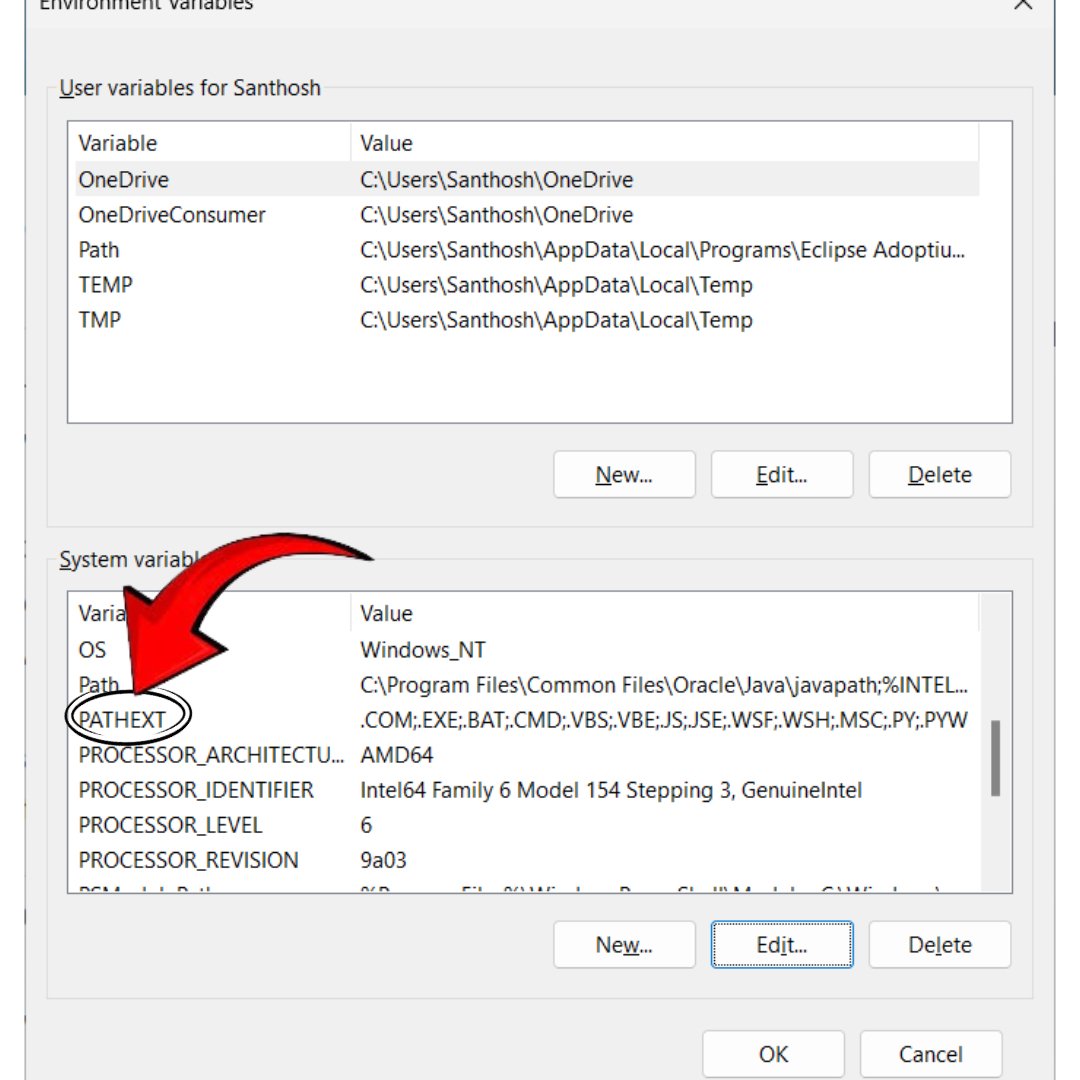
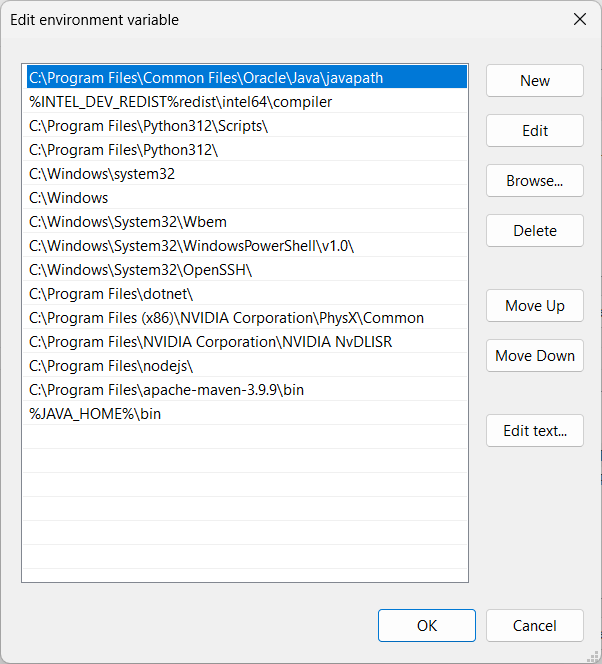
In “System Variables,” locate the Path variable and click “Edit.”
Add ;%JAVA_HOME%\bin at the end (make sure to include the semicolon).
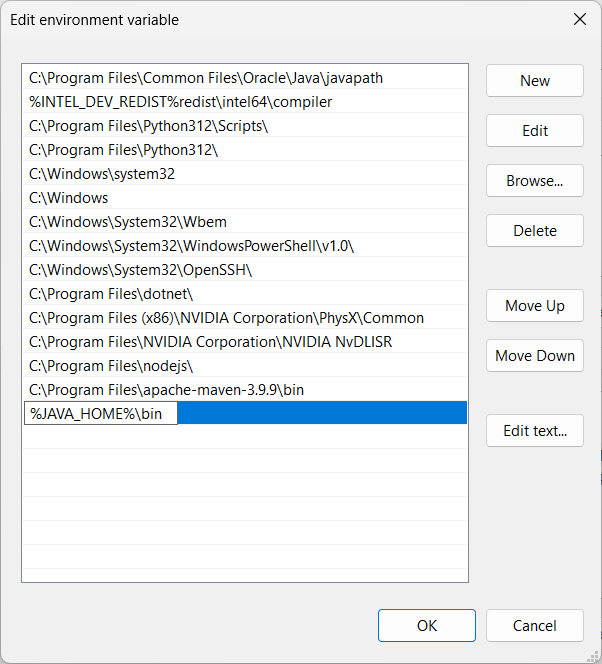
4. Save and Close:
Click “OK” to save the changes and exit the Environment Variables window.
For macOS and Linux
macOS: Once you download the .dmg file, double-click it to start the installation. macOS typically sets the path automatically.
Linux: For Linux users, the JDK can also be installed through terminal commands. For example, on Ubuntu, you can use the following:
sudo apt update
sudo apt install openjdk-xx-jdk
This will install OpenJDK, an open-source version compatible with most applications.
Step 4: Verify Your Java Installation
Now that your environment variables are set, you can confirm that Java is ready to use.
1. Open Command Prompt (or Terminal for macOS/Linux).
2. Run These Commands:
java -version: This checks the installed version of Java.
javac -version: This verifies the compiler version.
3. Check the Output:
If both commands display version numbers, your setup is complete!
Step 5: Create and Run Your First Java Program
To confirm everything is working correctly, let’s write and run a simple program.
1. Write Your First Program:
Open a text editor or an IDE (such as Visual Studio Code or IntelliJ IDEA).
Type the following code and save it as HelloWorld.java:
public class HelloWorld {
    public static void main(String[] args) {
        System.out.println("Hello, World!");
    }
}2. Compile the Program:
Open Command Prompt (or Terminal) in the folder where you saved the file.
Run javac HelloWorld.java to compile it. This generates a HelloWorld.class file.
3. Run the Program:
Enter java HelloWorld to execute. You should see the message Hello, World! displayed.
Conclusion:
Setting up the Java environment is an essential first step in your programming journey. With the JDK installed, environment variables configured, and your first program executed successfully, you’re ready to explore the vast possibilities of Java. This setup empowers you to create applications that run seamlessly across various platforms.
Interview Questions
1. What steps would you follow to install the JDK and set up your Java environment on a Linux system?(Infosys)
First, download the JDK package and extract it. Then, update the PATH and JAVA_HOME environment variables by editing files like .bashrc or .profile with the JDK path, ensuring that java and javac commands are globally accessible. Finally, verify the installation using java -version.
2. How do you handle multiple JDK versions on the same system for different projects?(Infosys)
On Linux, use tools like update-alternatives to set default versions and switch between them. On Windows, adjust the PATH variable as needed or use an IDE that allows configuring different JDKs for specific projects.
3. What is the purpose of setting the JAVA_HOME environment variable, and where would you set it on Windows?(Wipro)
JAVA_HOME points to the root directory of the JDK installation. It is set in the System Properties under Environment Variables on Windows, which helps other programs and scripts locate Java libraries.
4. What is the difference between the java and javac commands?(Wipro)
The javac command is used to compile .java files into bytecode .class files. The java command is used to execute these compiled .class files by interpreting the bytecode through the JVM.
Remember What You Learn!
Question
Your answer:
Correct answer:
Your Answers
